Save Money with Your Raspberry Pi: Web Server
This is the first in a series of posts titled “Save Money with Your Raspberry Pi”, whose aim is to explain, across several instalments, how to set up on your Raspberry Pi all those services you are probably paying external providers for (web server, email, cloud file storage, and so on), saving yourself a good deal of money every year. Thanks to its low power consumption and complete lack of noise, it makes a very attractive option for use as a home server.
In this first instalment we will explain how to host your websites on your Raspberry Pi and make them accessible over the internet.
These instalments assume you know how to access the Raspbian shell, either directly via a keyboard and monitor connected to the Pi, or remotely over ssh. If you use Linux as your operating system, simply open a terminal window and type ssh pi@192.168.1.2 (where 192.168.1.2 is the Raspberry Pi’s IP address on your local network). If you use Windows, I recommend putty. Run the exe and enter the target IP in the host field. Once the connection is established, you will be prompted for your username and password.
Installing Apache
Apache is a free, open source web server. To install it, simply run the following:
sudo apt-get install apache2
Once the process has finished, your server will be up and running — it’s that easy! To check, type the URL http://192.168.1.2 into the browser on your computer and press enter. You should see a page similar to this one:
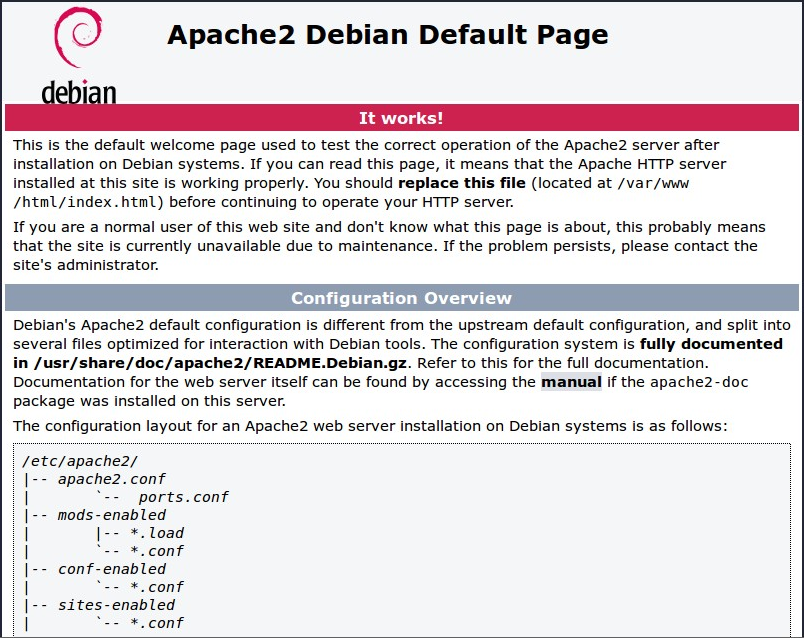
Although this is configurable, by default web pages are stored under /var/www/html, so in principle copying your site’s files to that path is enough. What I do recommend is creating a dedicated subfolder for each site within /var/www/html, as this allows you to configure the server with several domains at once.
If we create a folder called “miweb” inside /var/www/html and copy our site there, we will be able to reach it at the following URL: http://192.168.1.2/miweb
To make our server a little more secure, it is advisable to run the following commands from the directory where our site is hosted:
find . -type d -exec chmod 755 {} ; find . -type f -exec chmod 644 {} ;
That is, permissions of 755 for directories and 644 for files. 755 means execute, read and write for the owner, and read and execute for everyone else. 644 means read and write for the owner, and read only for everyone else.
If we want a particular folder to have write permissions so files can be created inside it (for example WordPress’s wp-content), we type:
sudo chown -R www-data:www-data /path/to/the/folder
www-data is the default user and group Apache runs under.
Apache only “understands” html pages, that is, pages with no logic whatsoever. To be able to install tools such as WordPress, Joomla, Drupal or similar, we need to enable the PHP engine.
Installing PHP
As complicated as typing:
sudo apt-get install php5
We then restart the Apache server so it loads the required modules:
sudo /etc/init.d/apache2 restart
With that, PHP is installed and ready to work alongside Apache.
Installing MySQL
Web tools usually need a database in order to work, so we will install MySQL, the most popular free-to-use database engine.
sudo apt-get install mysql-server
During installation you will be asked for the root (administrator) password. Choose a strong password and remember it, as you will need it later on.
For security reasons, the root user can only connect to the database server from the machine itself (localhost), but so that we can easily connect and work — creating new databases or managing data — we will configure the root user to be able to log in from any machine on our network.
To do so, we log in to MySQL:
mysql -u root -ppassword
Where password is the one chosen for root during installation. The lack of a space between the p and the password is intentional, since otherwise MySQL treats the space as part of the password. Once inside, we type:
GRANT ALL PRIVILEGES ON . TO ‘root’@‘%’ IDENTIFIED BY ‘password’ WITH GRANT OPTION; FLUSH PRIVILEGES;
Replace password with the root password.
We then exit MySQL by typing:
exit
Once this is done, on our desktop machine we can install MySQL Workbench, a tool for managing MySQL instances. It is available in the Ubuntu repositories, and for Windows at the following address:
https://dev.mysql.com/downloads/workbench/
Once installed, we run it and create a new connection:
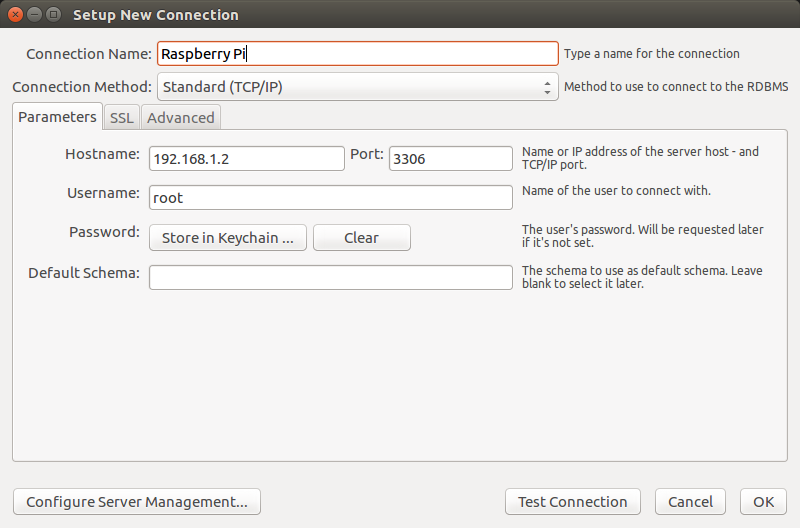
Once connected, we can create a new database by typing:
create database prueba;
Managing MySQL is beyond the scope of this article, but the concepts explained above are enough to create new databases within our instance and launch the installers for whichever tools we want to add to our web server, which will ask for a username and password to access the database and create the relevant tables and records. For simplicity we will supply the same credentials we used for our Workbench connection, although ideally, for security reasons, you would create separate users for each database.
Opening our site up to the world
All of this is well and good, but for now our server is only reachable from our local network, not from the internet. To change that, we need to tell our router to forward all traffic arriving on port 80 (the default port for the http protocol) to our Raspberry Pi. Every router is different and the settings may vary from one to another, but the key thing is to look for the Port Forwarding option or something similar.
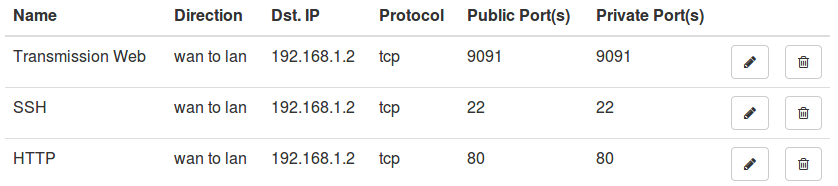
We will tell it to forward TCP port 80 to 192.168.1.2 (or your Raspberry Pi’s IP address).
Once this is done, using our public IP address — which we can find out via What Is My Ip — we can reach our web server from the internet, for example http://91.126.92.191/miweb. This URL is public and we can share it with our contacts.
Yes, the address is admittedly rather ugly; ideally we would like to reach it the same way we reach www.google.es or www.facebook.com, that is, with a domain name — but for that you will have to wait for the next instalment ;)